Create a Shortcut to open in your Alternate Browser
June 19, 2010 by Robert Owen
Filed under Internet, MicroSoft, Windows 7
Here’s a quick and simple “How To” for you. I had this question posed by a client the other day and it made me think. This Client is a fan of FireFox. It is his default browser and tries his best to NEVER use Internet Explorer. But, as is the case with most things, the more you try to keep from using something that’s right when you find out you have to.
This was the case here. He had a vendor’s website that would only work in IE AND he needed to use this website alot so, he had a shortcut on his desktop to get to it. The problem is the Internet Shortcut will open in his Default Browser… Firefox. Now, since he uses IE so infrequently, you would think – just make the website in question the home page and be done with it. But that won’t help if you have more than one shortcut.
So, here we go.
- First, right-click on your desktop and select New —> Shortcut

- This will open a new Window. Here you need to click “Browse” and Navigate to the folder containing the executable for the browser you are wanting to use.

- After selecting the executable you need to add your URL to the end. Make sure and put the URL outside the quotes surrounding the executable and make sure and put a space between the closing quote and the URL.

- Next, just give your new shortcut a creative name and click finish.

Now you have a URL Shortcut that will open in your non-default browser.
This doesn’t have to be just for Internet Explorer… This will work for any browser you want used for this particular shortcut. Firefox, Chrome, Opera… whatever.
Possibly Related Posts:
- My Latest Upgrade
- Warranty Schmarranty
- Windows 7 Telnet Client
- Google Wave Invites
- Windows 7 error 86
Windows 7 Telnet Client
December 7, 2009 by Robert Owen
Filed under MicroSoft, Windows 7
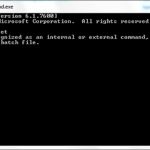
I dropped to a command prompt today on my Windows 7 machine to telnet into my Cisco Router and found, that once Again the Microsoft telnet client is not installed.

It seems that, as with Windows vista, the Microsoft Telnet client is not installed by default. But luckily it’s pretty easy to install, just follow these simple steps:
- Click the Start “Pearl” and select the Control Panel from the menu.

- Once the Control Panel opens, double click the Programs and Features applet.

- A new window will open. Select “Turn Windows Features on or off” from the left menu.

- Again, a new window will open. Check the box beside “Telnet Client” … Also, if you want to enable your “Telnet Server” or “TFTP Client” you can select them at this time also. Click Ok after you have finished your selections.

- Windows will not prompt you that it is installing the components.

After if completes you will be able to make use of the Windows Telnet client.

Enjoy!
Possibly Related Posts:
- Create a Shortcut to open in your Alternate Browser
- My Latest Upgrade
- Windows 7 error 86
- Windows 7 Clean Install from Upgrade
- Use the Snipping Tool to Capture Menus

